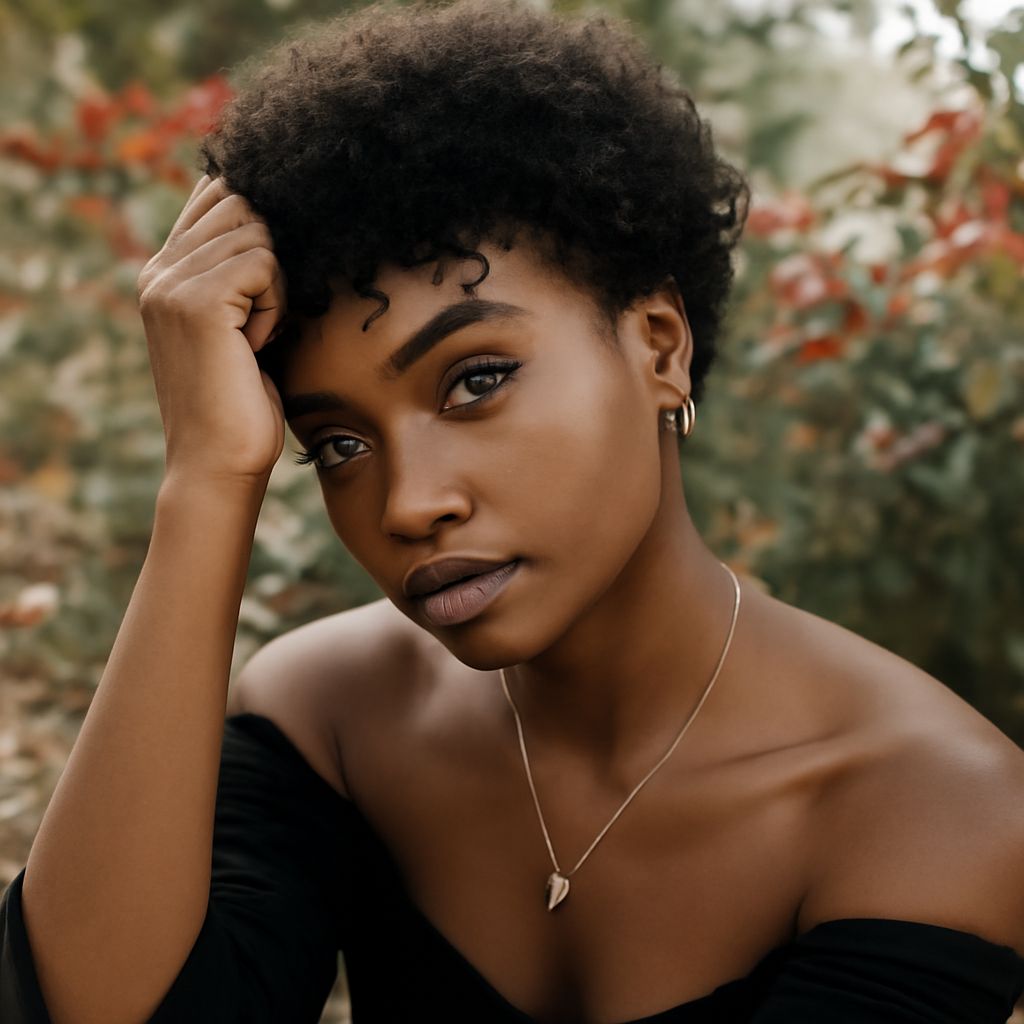
The most reliable lighting for portraits starts with the key light, not the subject’s final pose. Place the light first, then rotate the body and face until it creates shape without hiding the eyes. This sequence gives you control over cheek shadows, catchlights, separation from the background, and a natural relationship to the camera.
Use a consistent setup: establish the source, place the subject, build the pose from the feet upward, then adjust face angle and expression. Check the eyes and shadow edges after every meaningful change, because a small turn can alter both the light pattern and the mood.
Lighting for Portraits: Set the Light Before Fine-Tuning the Pose
Start with one key light so every shadow has a clear cause. A large, soft source creates flattering transitions; a smaller source gives crisper definition.
- Height: Place the center of the source slightly above eye level and angle it down toward the face. Keep the catchlights near the upper iris. If the eyes look dark, lower the light or move it closer to the camera axis.
- Direction: Begin 30–45 degrees to either side of the camera. This creates a readable cheek shadow while keeping both eyes connected to the light. Move the source toward the camera for more open, even illumination; move it farther to increase side modeling.
- Softness and distance: A source positioned close to the subject appears larger and softer. Keep the subject 1–2 metres from the background when possible to reduce a hard wall shadow and improve separation. Move the subject rather than twisting the pose if the background is distracting.
Use a Portrait Posing Guide From Feet to Face
Use a portrait posing guide as a repeatable feet-to-face sequence. Make one adjustment at a time so you can see how posture changes the shadows.
- Feet: Stagger them slightly, place weight on the back foot, and angle the front foot toward the camera. This prevents a rigid, square stance.
- Hips and shoulders: Turn the hips 20–45 degrees away from the camera, then bring the shoulders back only as needed. The nearer shoulder should not block the light from the face.
- Hands: Give each hand a job: touch the waist, hold a lapel, rest lightly on a thigh, or frame the face. Keep fingers separated, relaxed, and angled rather than pressed flat.
- Head: Lengthen the neck, bring the forehead slightly forward, and keep the chin level or subtly down. This defines the jaw without creating a heavy neck shadow.
Match Face Angle to the Lighting Pattern
Effective posing for portraits changes the shadow pattern as much as moving the light. Match the face angle to the pattern instead of forcing one pose for every setup.
- Loop lighting: Turn the nose 20–30 degrees toward the key. The small nose shadow should fall toward the cheek without merging completely with the cheek shadow. This is a flexible starting position for a relaxed expression.
- Rembrandt lighting: Rotate the face toward the key until a small triangle of light remains beneath the shadow-side eye. Keep the far eye visible and catchlit; turning too far away can make the face look closed.
- Split lighting: Place the key near 90 degrees to the subject. Keep the face close to camera-facing for a strong, graphic result, or turn slightly toward the light to soften the shadow side while retaining character.
- Butterfly lighting: Position the source above and near the camera, then bring the chin slightly forward and down. This preserves the eye catchlights and creates a controlled nose shadow beneath the bridge.
Refine Posing for Portraits: Face Angle, Body, and Expression
Finish posing for portraits by checking the whole frame, not just the face. If a pose weakens the light, move the subject or key light before asking for a more extreme angle.
- Posture: Keep one shoulder lower, maintain a gentle curve through the torso, and avoid compressing the neck into the nearest shoulder.
- Hands: Look for bent joints and soft wrists. Hands should support the pose, not compete with the face through size or tension.
- Face angle: Turn the nose slightly away from the camera for shape, then bring the eyes back to the lens. If the nose shadow touches the cheek shadow, rotate toward the key or shift the key closer to camera.
- Expression: Ask for a slow exhale, a relaxed jaw, and eyes directed at the lens or just beside it. Try a closed-mouth expression, then a slight parting of the lips without changing the head angle.
- Final check: Confirm both eyes have detail, catchlights are present, the nose and chin shadows are intentional, the far cheek has enough shape, and the subject separates cleanly from the background.